
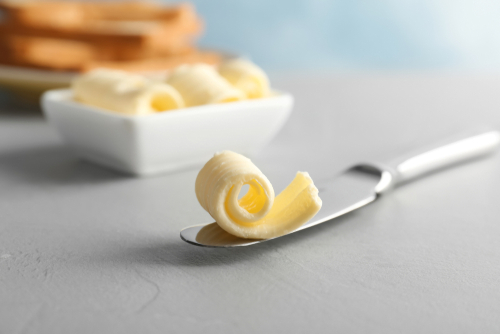
Pass the Butter, Please
During these unprecedented times, we see things rapidly disappearing from grocery store shelves. Things like toilet paper, eggs, and vinegar have become rare items. There was a time that the butter aisle was vacant as well, but most grocers around seem to have gotten this issue under control.
But, what if I don’t want to buy pasteurized butter? No big deal, right? I don’t usually get my butter from the supermarket anyway. I go to a local retailer or distributor that sells the beautiful golden spread that I love. Oh no! They’re out too. In the haste to make sure they never run out of anything, people who typically never eat unpasteurized products have bought out most of the supply. My local retailer is out now, and my family loves butter.
I love the flavor of butter, but what’s the point of eating it if all the goodness has been pasteurized out?
 You’re in luck! People have made butter as a means of storing excess milk for millennia. According to the American Butter Institute, butter goes back about 10,000 years, and the first written record of butter dates back to a 4,500year-old stone tablet describing how to make butter. So, I decided, if they could do it, why can’t I?
With that seed germinating in my mind, the next time I bought my Pineshine raw milk and cream order home, I took to the internet to walk me through turning white gold into yellow gold ? Google is a wonderful place filled with teachers and mentors, bursting with videos that will give you all the instruction you need.
I now share with you the culmination of my research and personal practice. There are many ways to make butter. Some are fast, and some are slow. I’ve collected three that I think are the most viable. So grab your heavy cream and…
Let’s Get Churning!
First a Few Tips:
- Make sure the cream is at room temperature before starting to churn. The recommended temperature range is about 55-65 degrees Fahrenheit; however, we have found that churning cream on the warmer end of that spectrum (ideally 63-65 degrees) will speed up the process considerably!
- Never warm up the cream in a microwave. Instead, let the cream warm up slowly on the counter. Also, do not let the cream get warmer than 70 degrees or your butter may turn out gloopy and may not fully separate from the buttermilk.
- Rinse your finished butter thoroughly in cold water. Make sure all of the residual buttermilk is removed from the butter by kneading it with a wooden spoon, butter paddle, spatula, or just get in there with your fingers. The liquid buttermilk only stays fresh for 4-5 days, whereas full-fat butter that is free of buttermilk can keep for two weeks or more refridgerated.
- Be sure to save your fresh buttermilk. It is a wonderful ingredient that can be used for pancakes, baking, marinades, salad dressings, etc. Use up your buttermilk within a couple of days post-churning to ensure
freshness!
- The best time to make compound butter is right after rinsing the butter. At this point, your butter will have a lovely, soft consistency, and it is the perfect moment for adding herbs, spices, honey, roasted garlic, etc.
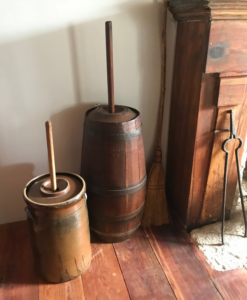
Hand-churned Butter
The process of hand-churning butter has been used throughout the Americas and beyond. If you’re like me and you grew up in the South, then chances are you’ve seen an antique butter churn sitting on your grandmother’s porch. And, every time you looked at it, you probably heard the stories of how they did it in the old days.
Well, today’s hand-churn is a little different. The modern iteration requires a large jar or a deep bowl and a hand mixer. Now, if you want to spend a bit of money on this project, you can find hand-crank butter churns online. It’s basically a hand mixer fitted with a lid that will screw on to your jar, ensuring that you lose none of your precious liquid.
However, if you don’t mind getting messy (fun for the whole family), you may simply use a deep mixing bowl and a regular old hand mixer. You’ll want to start with about 600ml or 20fl-oz of heavy cream—the higher the fat content, the better.
Pour in all your cream and start your little engines. With a hand mixer, you’ll be cranking for about 10-15 minutes. You’ll want to go at a brisk pace throughout. You’re looking for butter-like consistency.
Throughout the process, you will see the cream separating into golden butter and a whitish byproduct of buttermilk. Essentially, we’re separating the solids from the liquids. After about 15 minutes of vigorous cranking, you’ll have wonderfully unpasteurized gold.
3-Minute butter
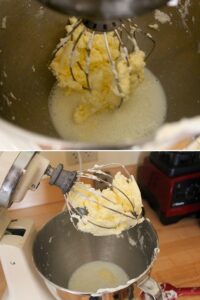
Now, if you weren’t impressed with hand-churned, and you have access to a stand mixer, then the process will take far less of your time and energy. You’ll need a standard whipping attachment for this.
The process is essentially the same as in the hand-churned scenario. You’ll pour approximately 600ml or 20fl-oz of heavy cream into your mixing bowl. Start whipping on low-medium speed until you see it start to thicken. Once, it seems safe that nothing is going to come flying out of the bowl, turn up the speed to high for about three minutes. You may want to watch as the cream separates effortlessly, before your eyes, or continue with other tasks. Either way, after about three minutes, you’ll have two magnificent ingredients: butter and buttermilk.
After three minutes, you’ll have to do a tiny bit of work. Pull the butter out and squeeze out the excess buttermilk with your hands or use a utensil. Mmm…mmmmmm…
 Pioneer Butter
Caution: this is not for the faint of heart. I recommend this version of butter churning for a household with energy to burn. This is a fantastic activity to do with the kids while we’re all stuck indoors.
For this, of course, you’ll need your cream, and then all you need is a jar with a sturdy lid. It doesn’t matter what size jar you use. I’d recommend smaller jars for smaller people, or just a smaller a jar on your first test-run, so you know how what you’re dealing with.
Now, you’ve got your unpasteurized heavy cream, your jar with a secure lid, and muscle-power. No matter how large your container, fill it about half-way and put that lid on tight. Then shake. Shake HARD. This is vigorous work. You can set a timer and even make it into a race with the kids, once you’ve gotten your rhythm down.
After about ten minutes of good-shaking, you’ll have the two byproducts of cream: butter and buttermilk.
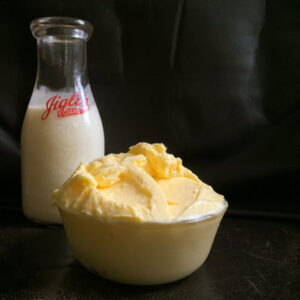
Gold & Delicious
If you live in your kitchen while you are away from work. If your family loves to spread fresh butter on their toast. Or maybe you just can’t get enough butter. There’s no reason for you to go without during these lean times. So, place an order for cream, come pick it up, and get shaking.
There are tons of great recipes online for making herbed butter, spiced butter, and any other kind of butter under the sun. When you’re making yourself, you can have it just the way you like it.